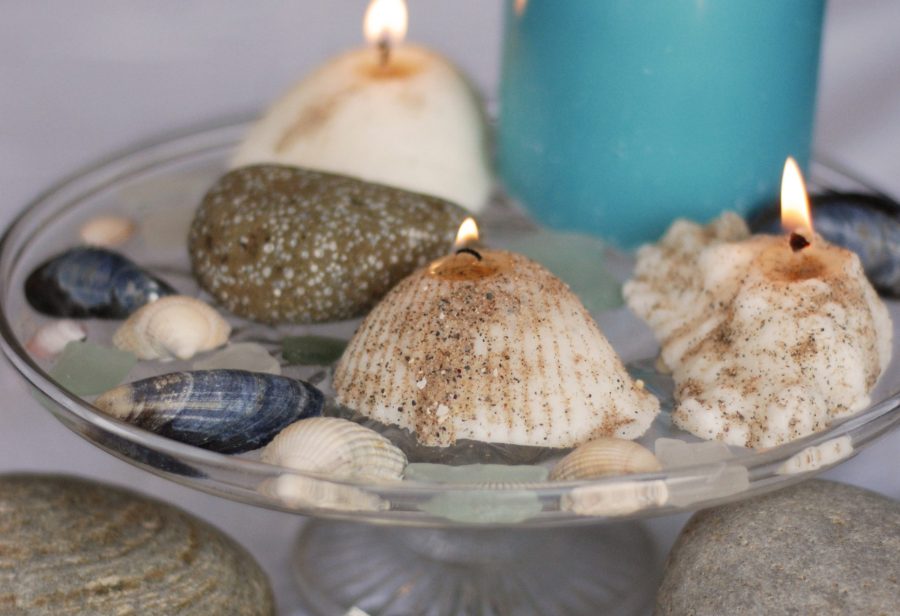
Transform shells found on the beach into eye-catching design elements and striking table centrepieces with this simple mould-making technique. Words and photographs: Shore Cottage Studio
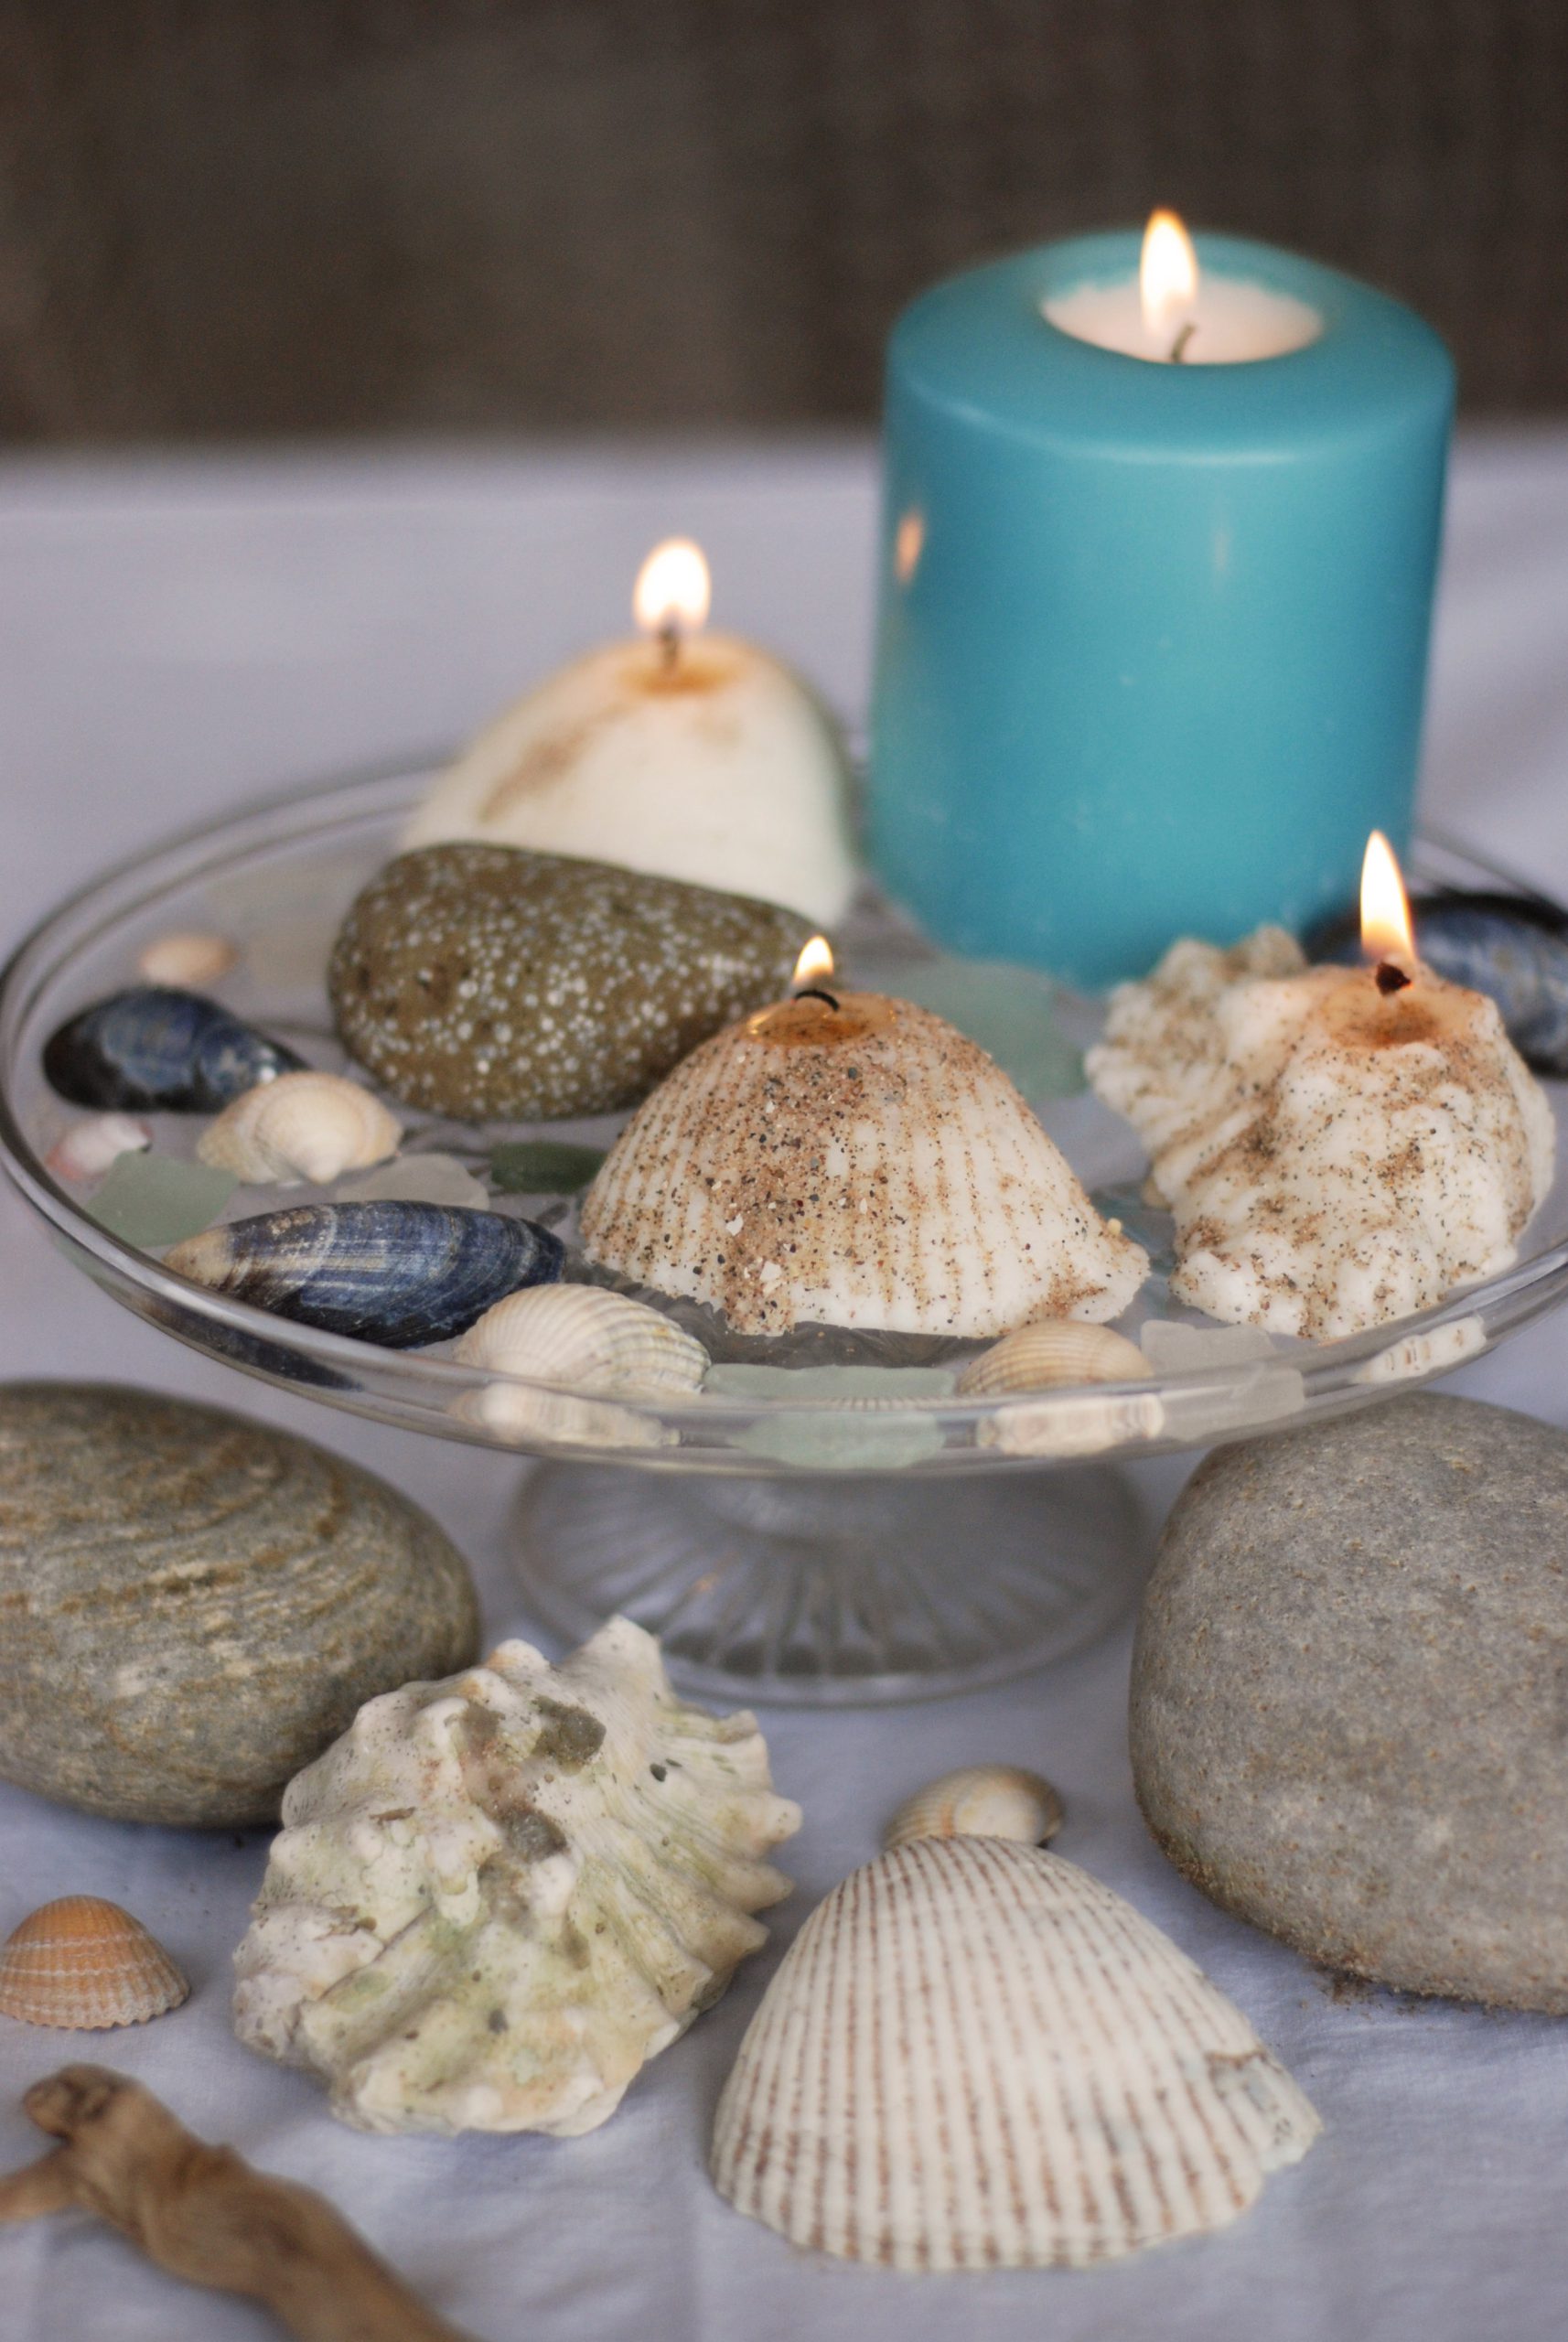
These candles are cast in sand using real shells as moulds. You may have found some sizeable shells on your travels, or you may want to buy some more exotic specimens. Shells are undamaged by this process so can be used to create more candles, and look great in a mixed shell and candle display.
You can customise the finish of your candles; create a rustic look by leaving some sand adhering to the candle, or a more modern look can be achieved by removing all the sand for a clean white finish. Why not add a few drops of perfume oil or candle colour to make them totally unique.
The size of the shells you use will determine the burn time; larger shells will burn for longer. The sizes we’ve made here won’t last a full dinner party, but could form a centrepiece lit for a cheese and wine course, for example.
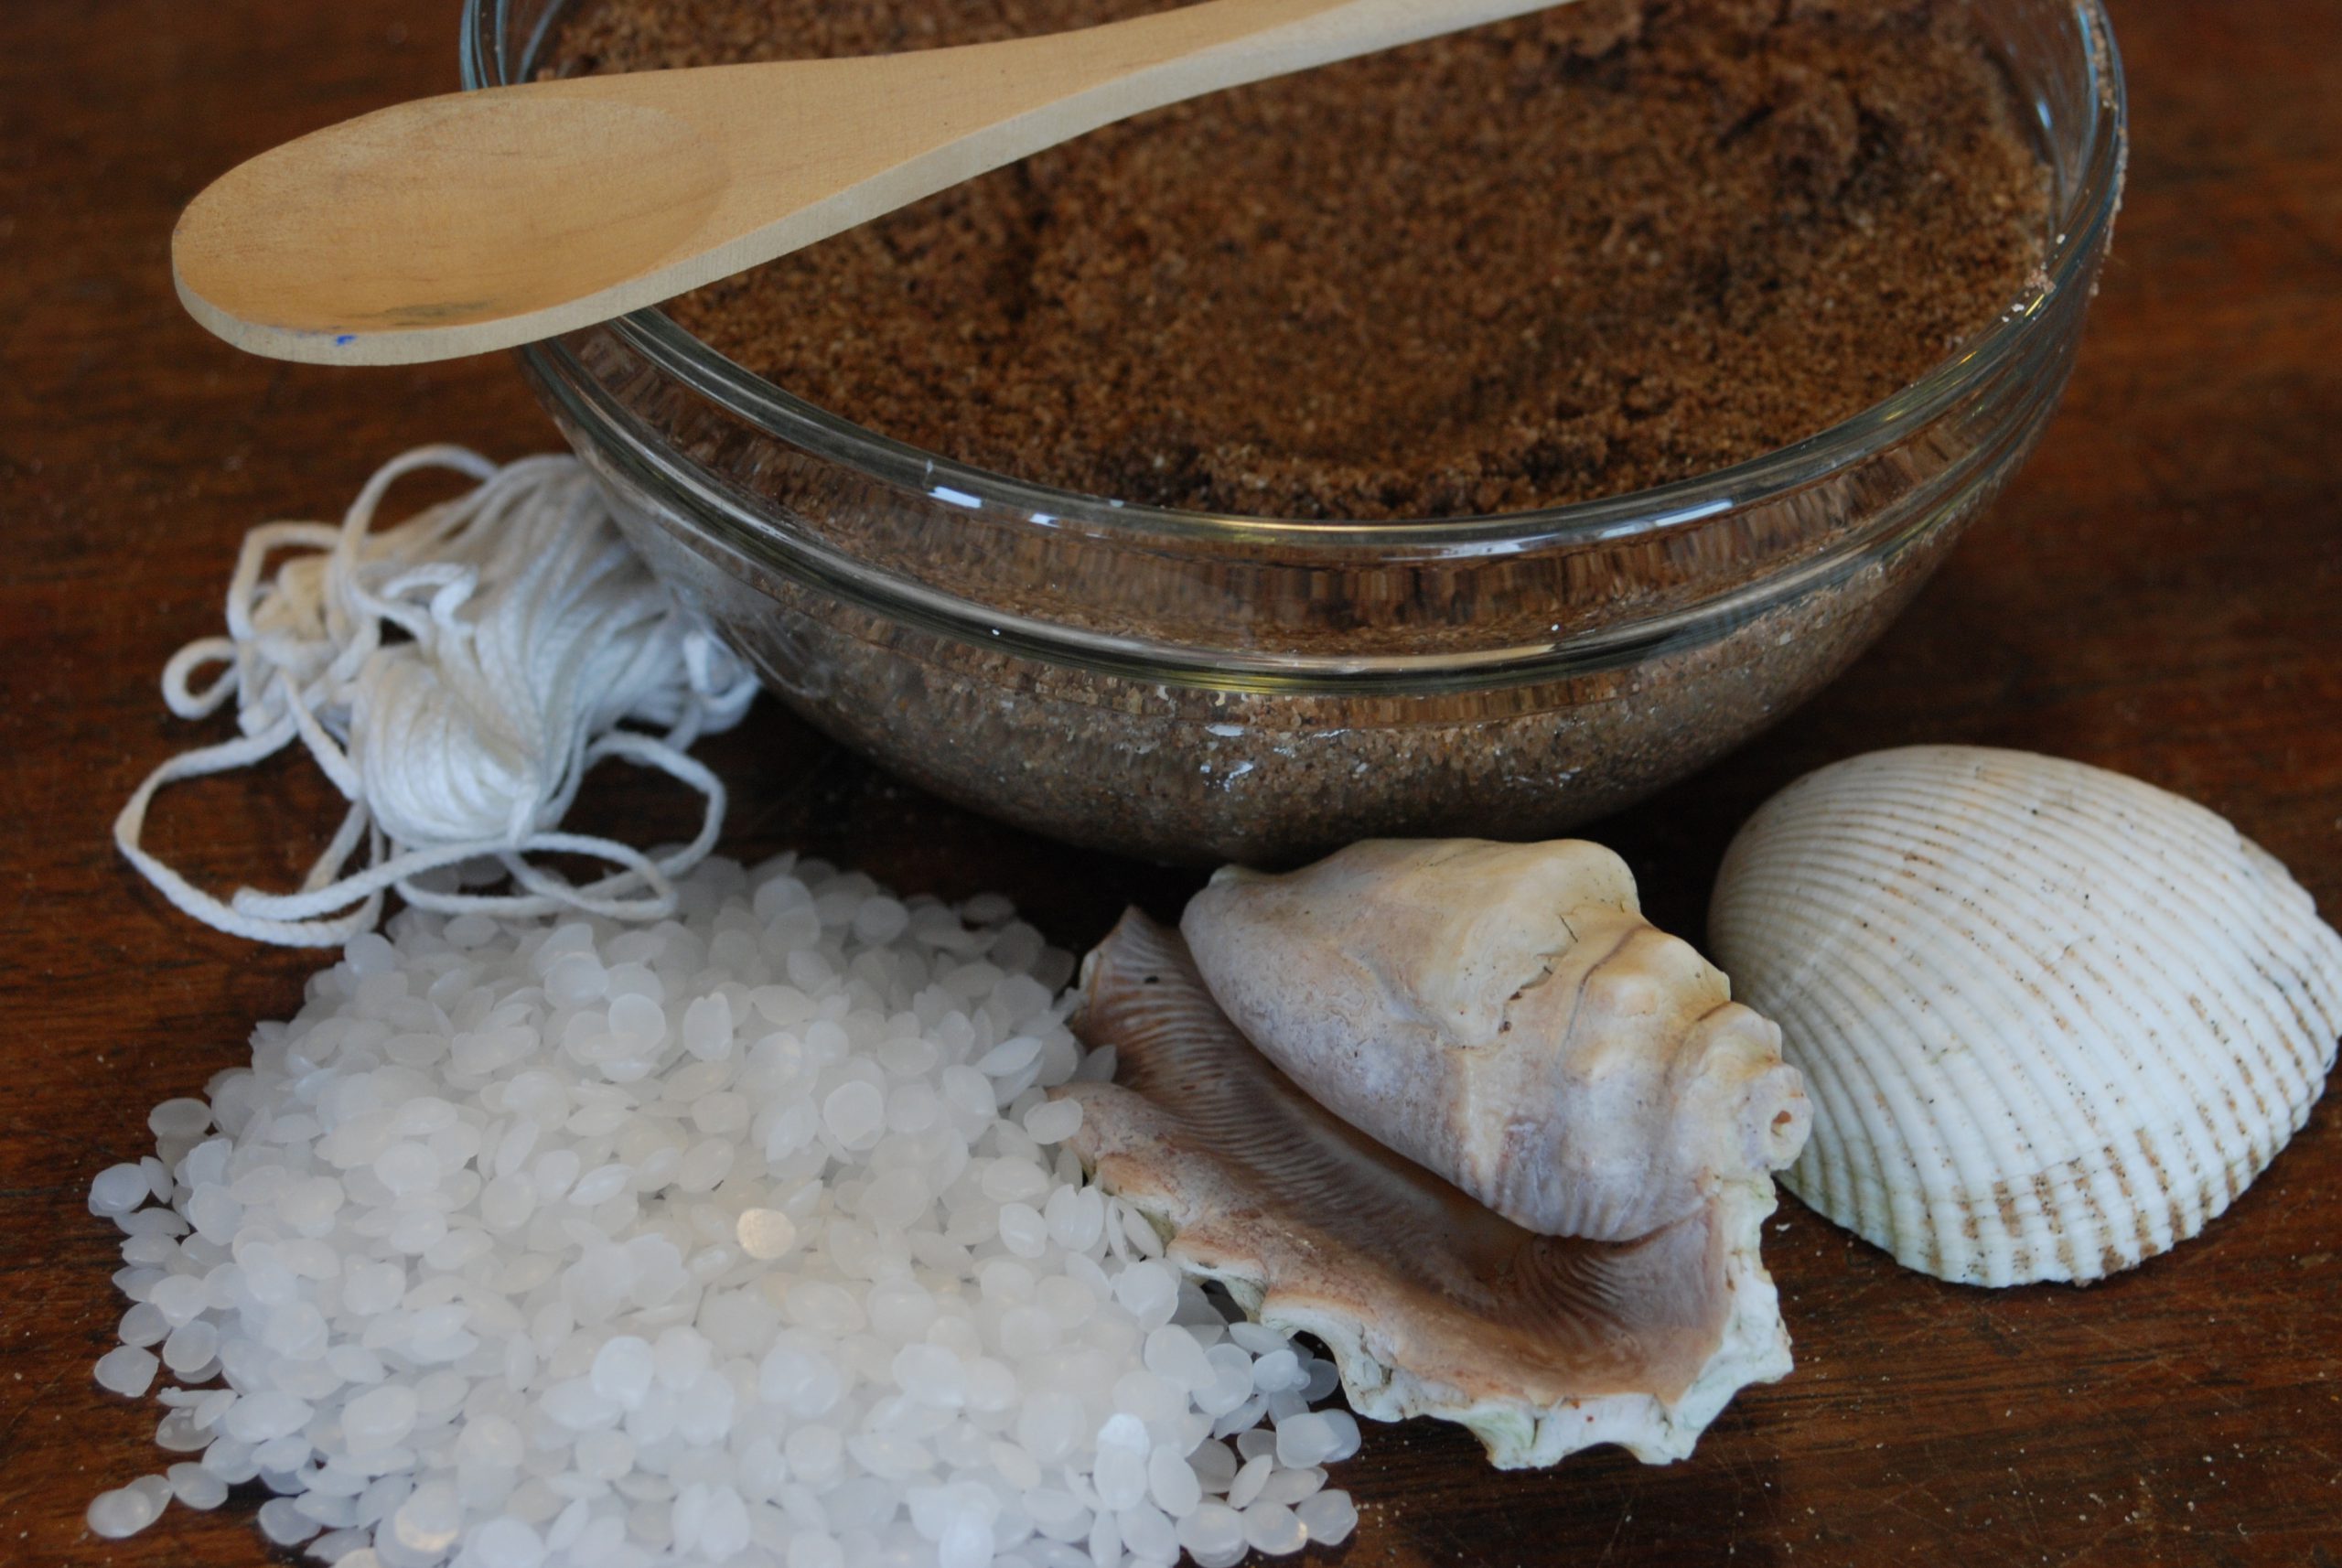
You will need to buy candle wax pellets and wick from a craft shop and, if you are not as close to a beach as we are, you can use builders’ sand or play sand to cast your shells. Candlewicks either come soft and loose, like ours, or stiffened. To enable you to poke the wick through the sand at the bottom of the mould, you can stiffen the wick by dipping it into the melted wax and letting it cool and harden. Candles should be placed on a suitable surface as their irregular shape may mean they run hot wax over the edge. Always take care with lit candles.

WHAT YOU NEED:
• Large shells to cast
• Basin of sand
• Wooden spoon
• Candle wax pellets
• Candlewick
• Double boiler or basin over a pan of boiling water
METHOD:
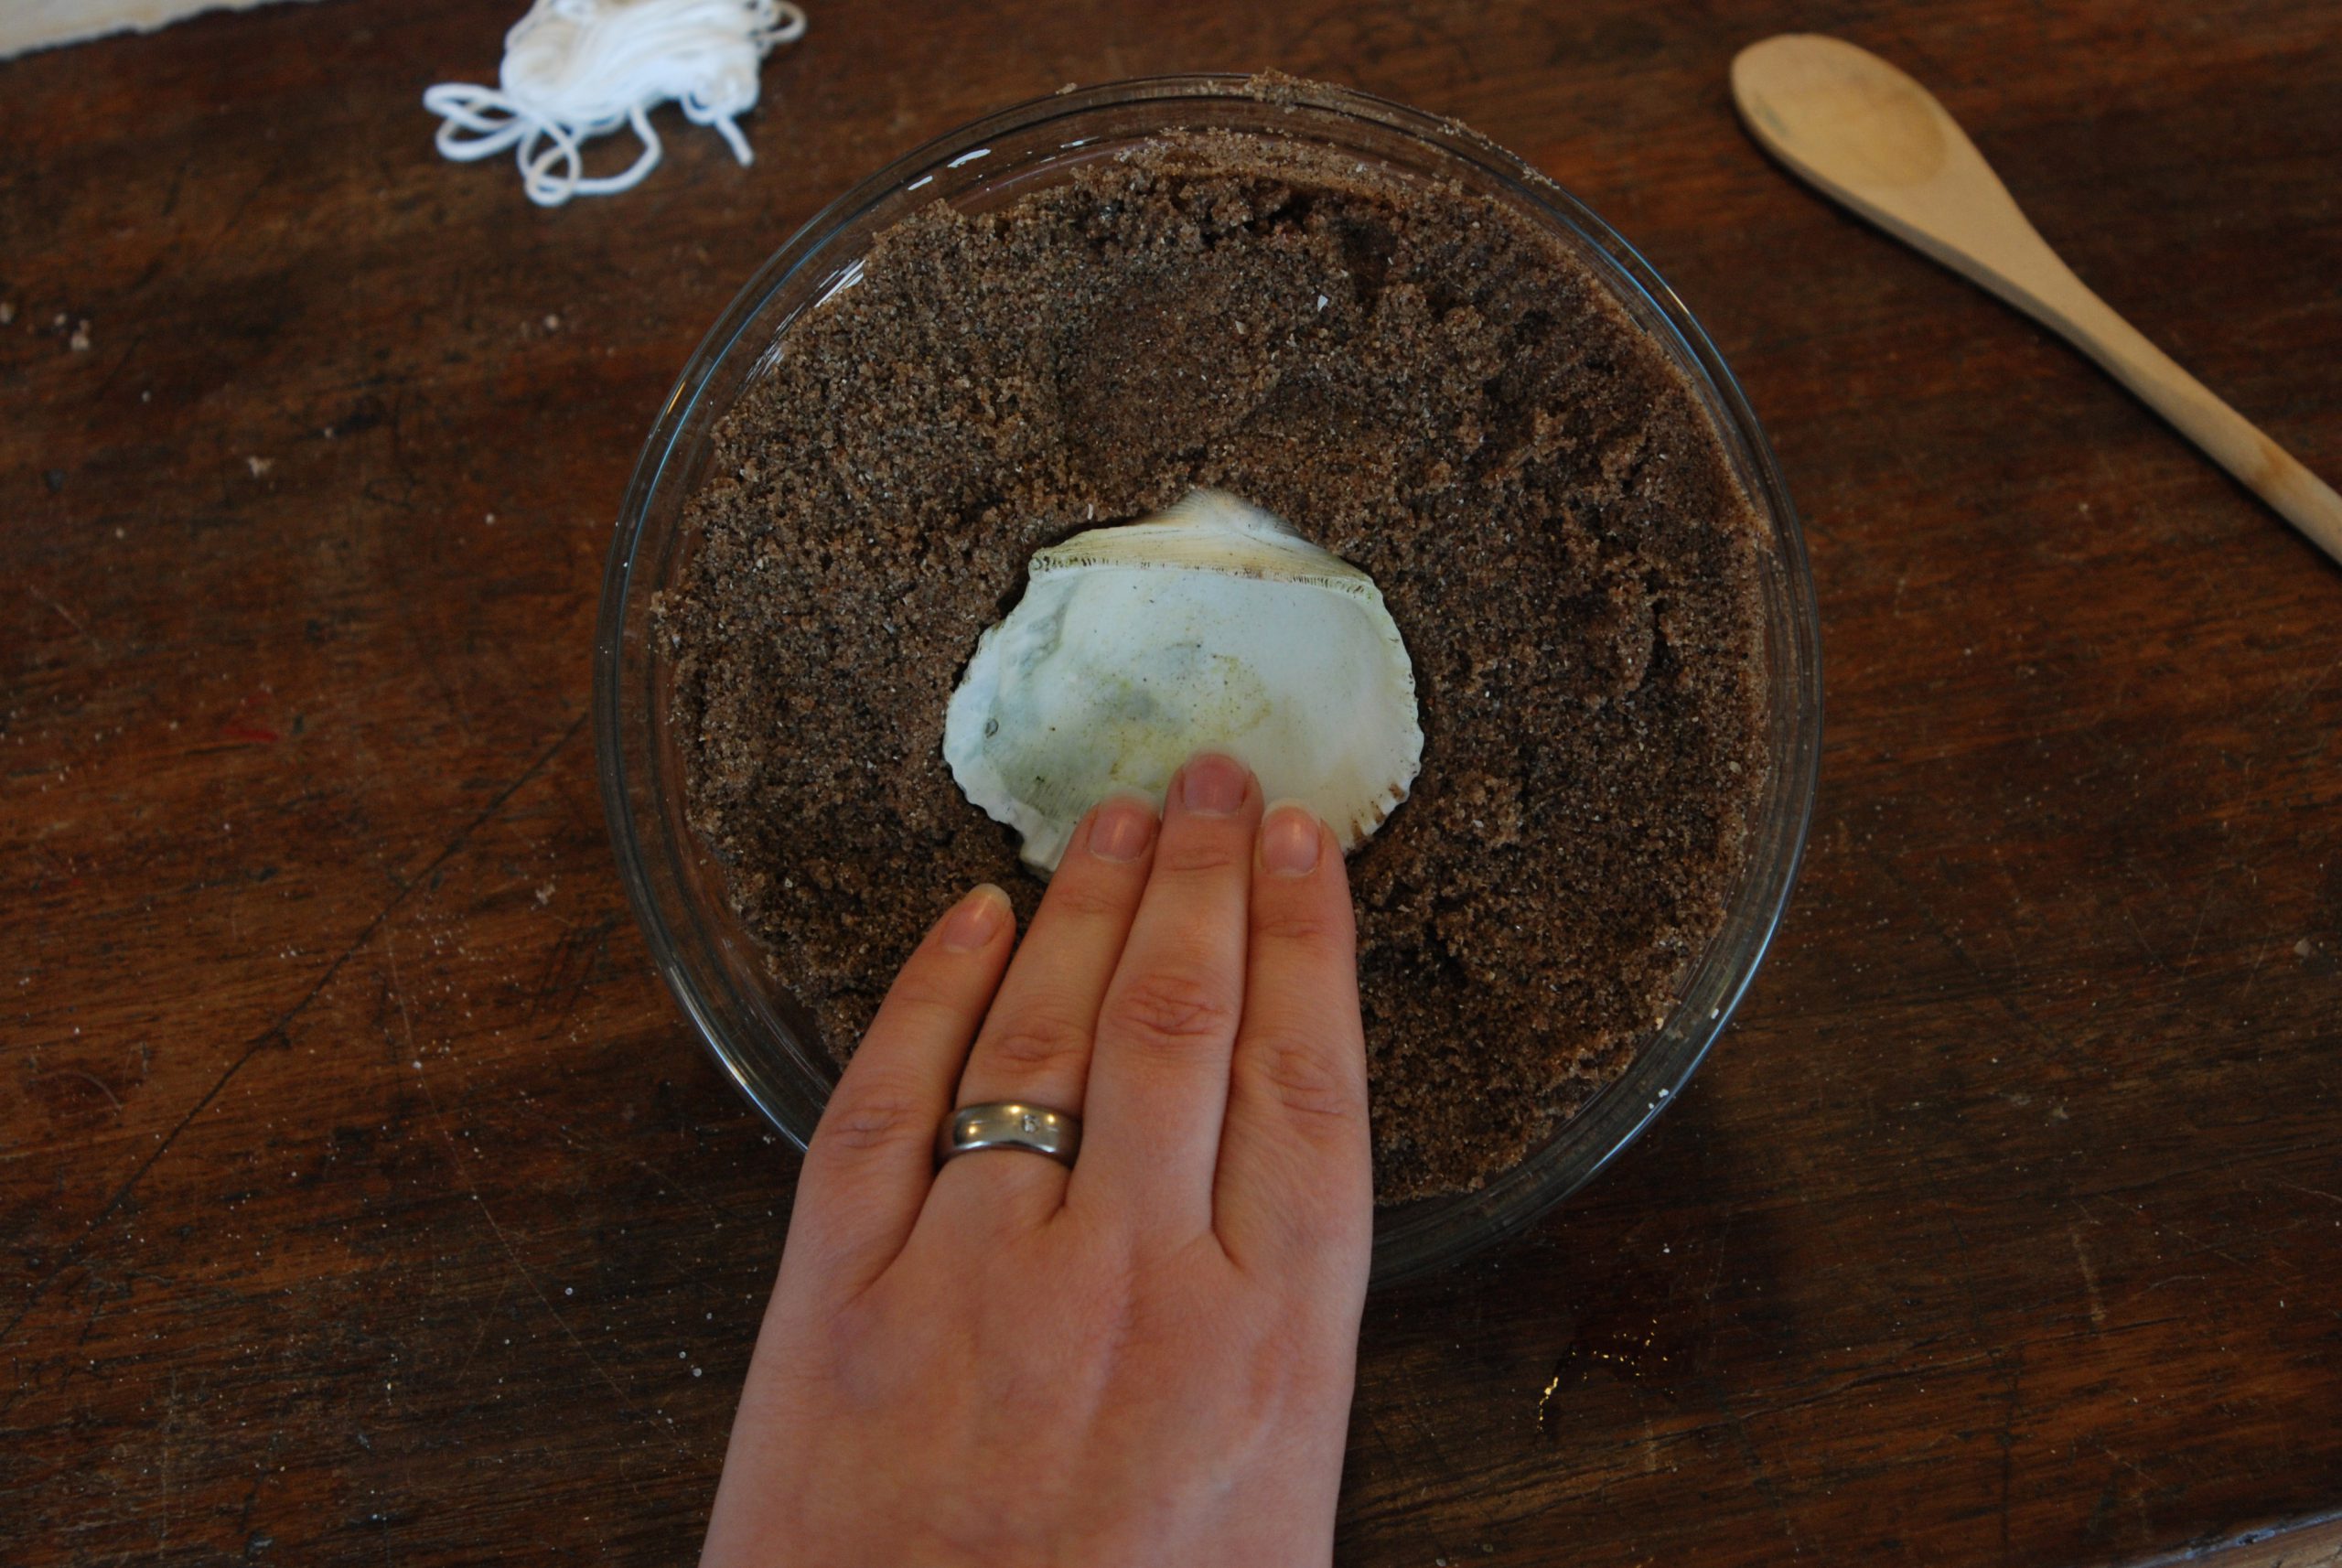
1. Dampen your sand so it will hold the shape, press the shell into the sand and carefully remove to leave a clean shell-shaped mould.
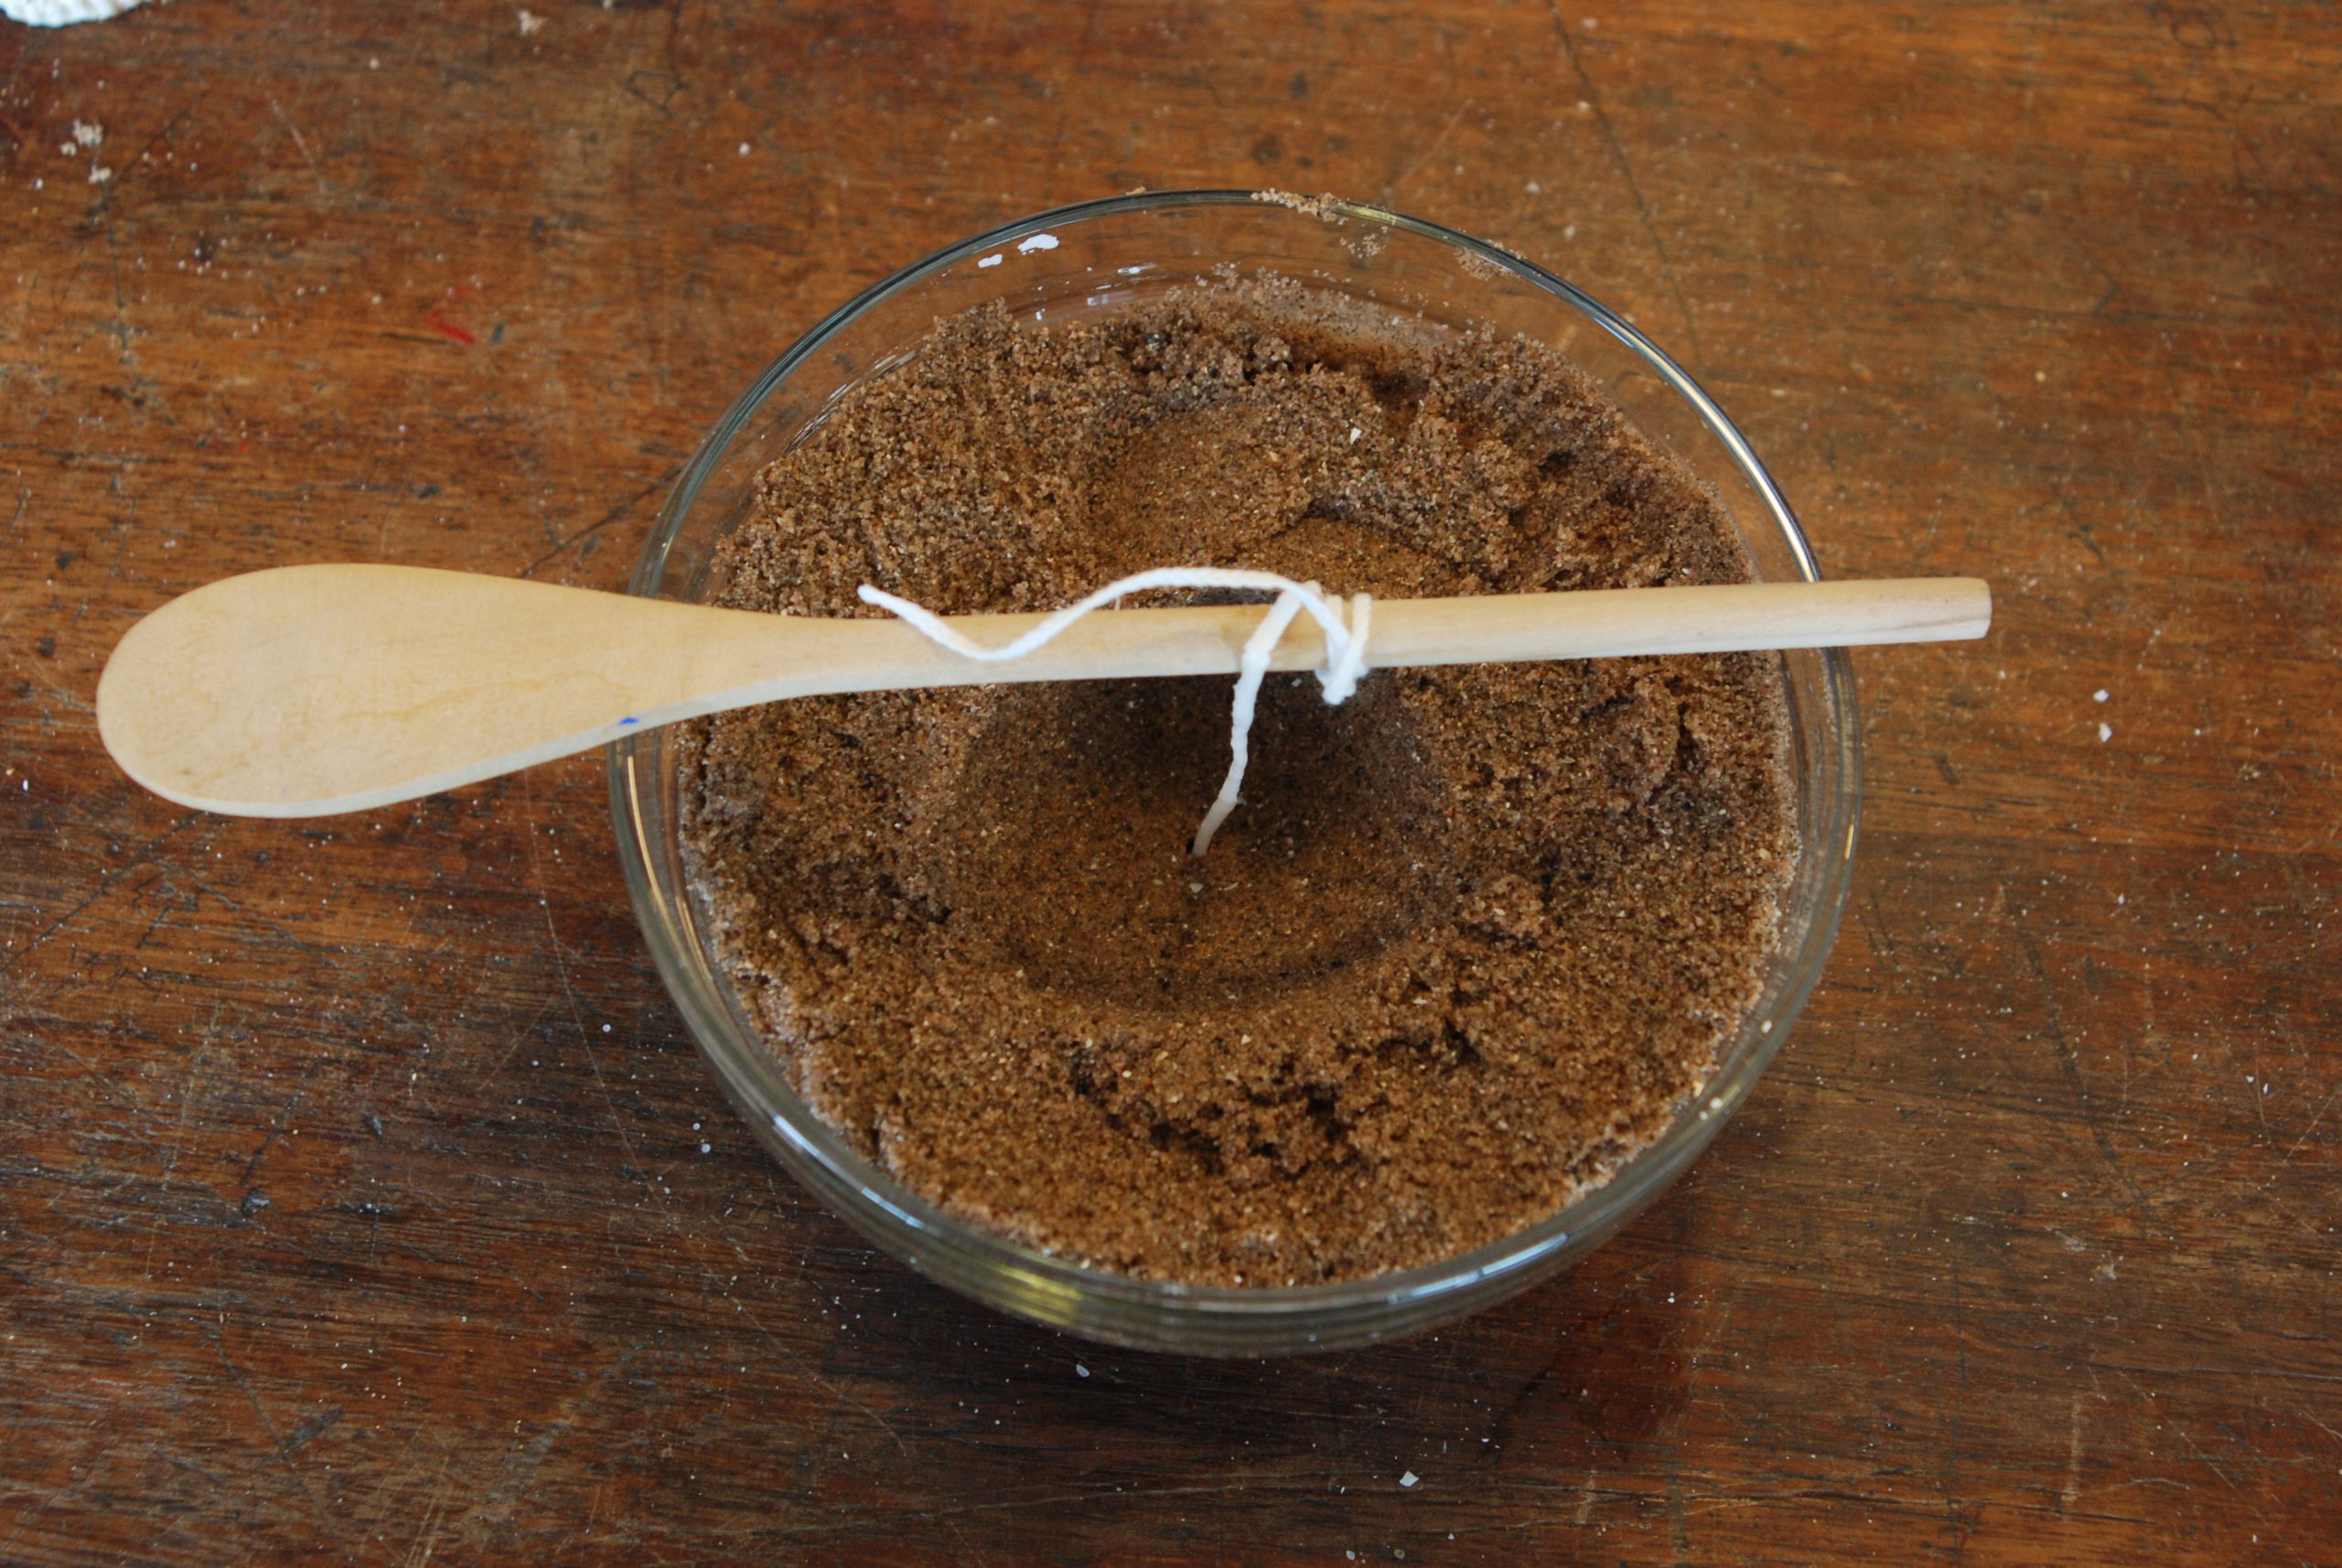
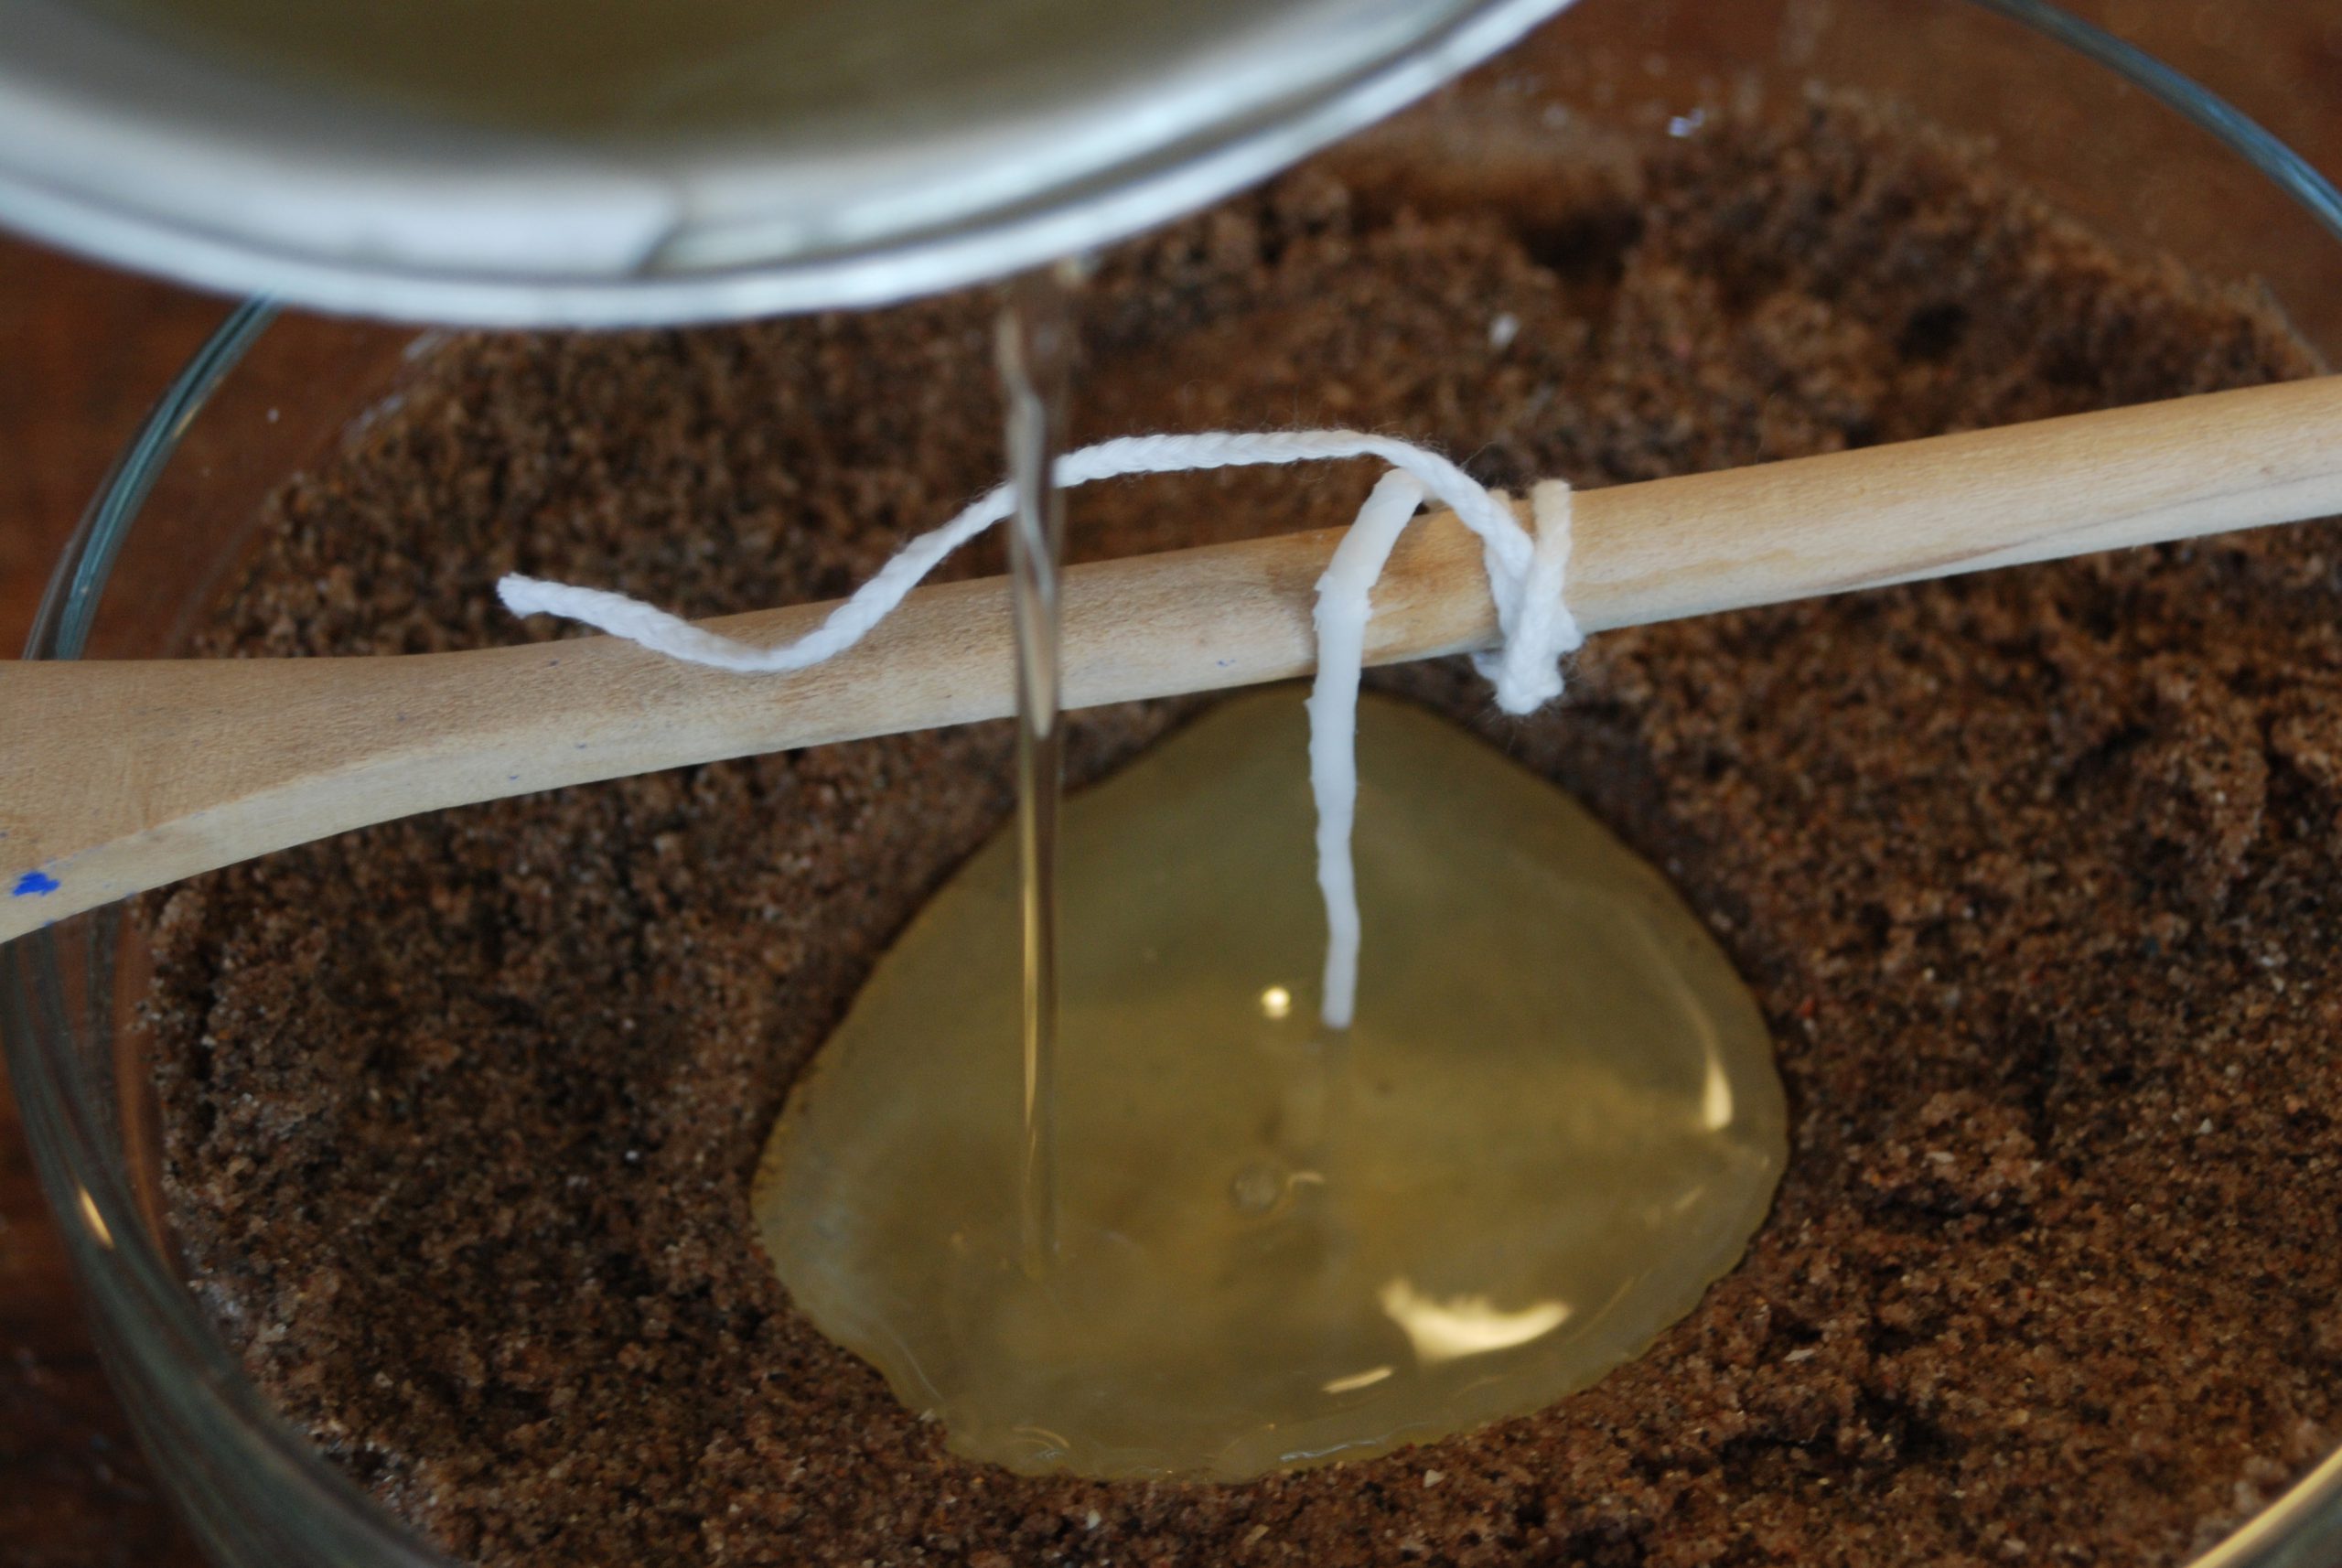
2. Poke the wick through the bottom of the shell shape so it will stick up out of the candle. Tie the wick to the wooden spoon so it hangs straight.
3. Melt the wax pellets slowly in a basin over boiling water, as if you were melting chocolate. Pour slowly into the mould; don’t disturb the wick.
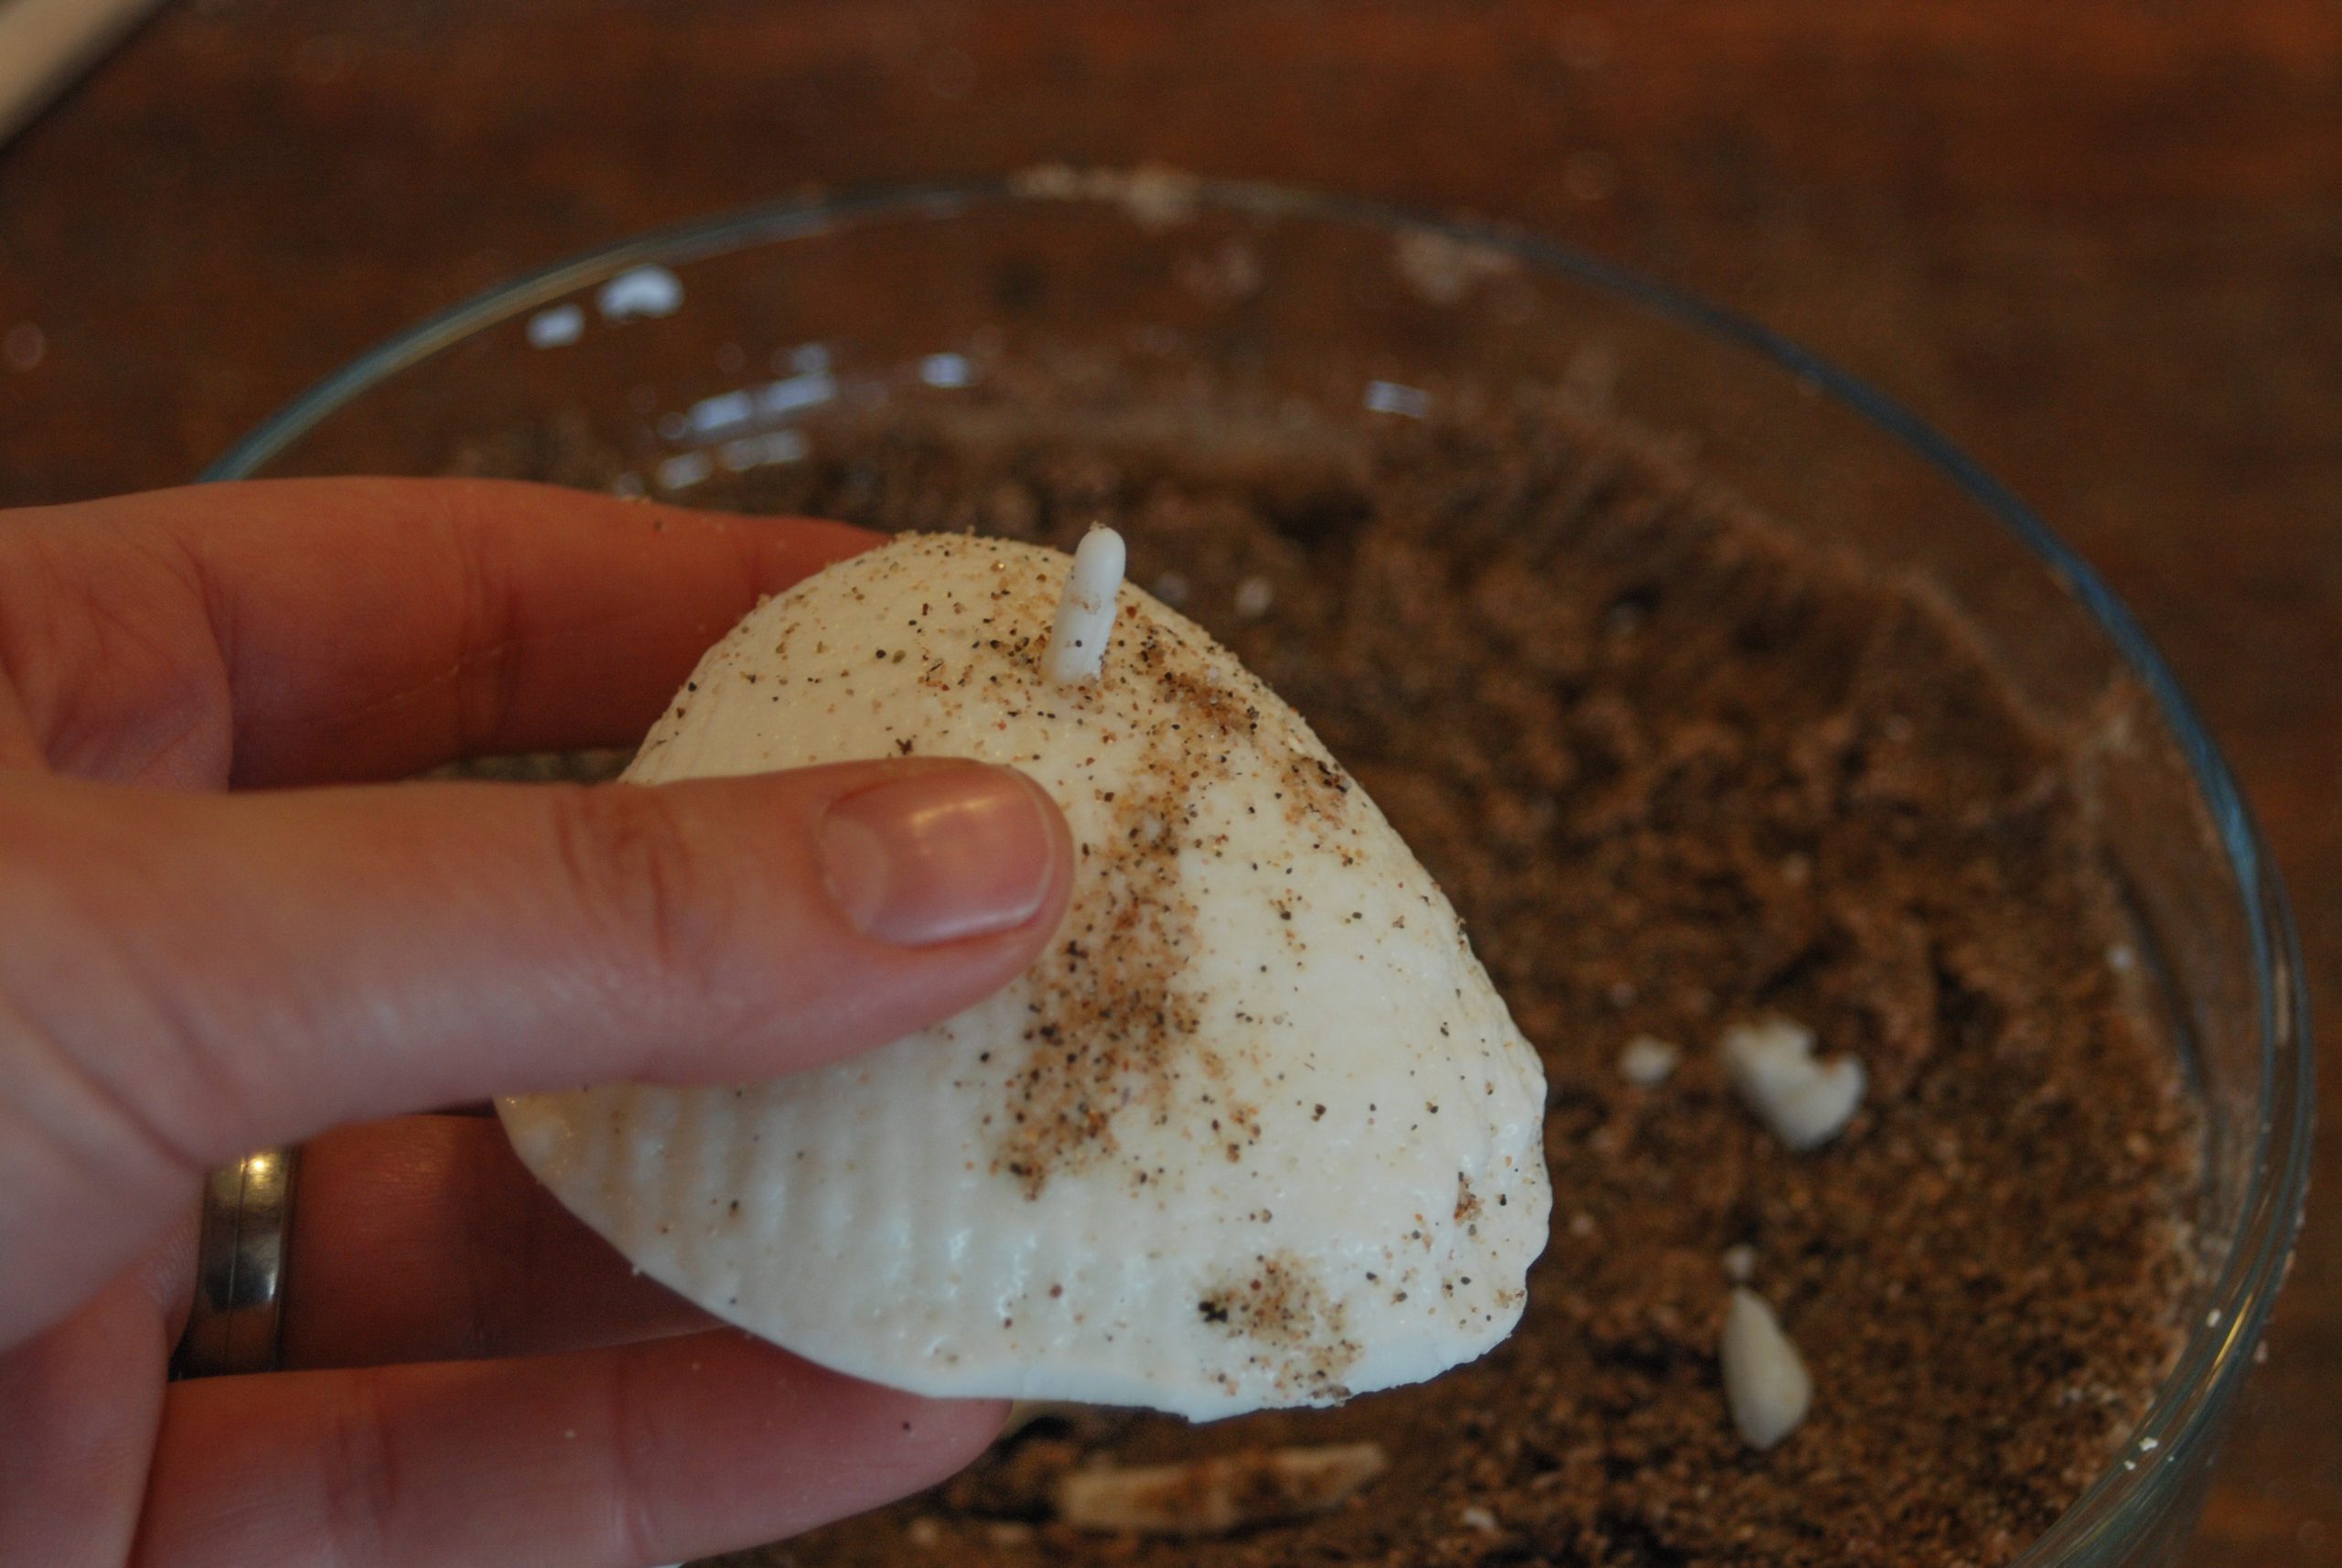
4. After cooling for at least 45 minutes untie and trim the wick, then brush off as much or as little sand as you like to reveal the candle.
Click through our gallery below to see the candle in process:
In search of more crafts? Take a look at our step-by-step guides to a seaside monoprint and knitted journal cover, or keep an eye out for crafts in the magazine.
ABOUT SHORE COTTAGE STUDIO
Shore Cottage Studio consists of three generations of artists living and working on the Wirral Peninsula. They run short creative courses in fused glass, photography, textiles and laser-etching, taking inspiration from their surroundings. They also exhibit their work and produce commissions. Oh, and there’s usually cake. You can book a course or commission a piece from Shore Cottage on their website (shorecottagestudio.com).
Transform shells found on the beach into eye-catching design elements and striking table centrepieces with this simple mould-making technique. Words and photographs: Shore Cottage Studio
These candles are cast in sand using real shells as moulds. You may have found some sizeable shells on your travels, or you may want to buy some more exotic specimens. Shells are undamaged by this process so can be used to create more candles, and look great in a mixed shell and candle display.
You can customise the finish of your candles; create a rustic look by leaving some sand adhering to the candle, or a more modern look can be achieved by removing all the sand for a clean white finish. Why not add a few drops of perfume oil or candle colour to make them totally unique.
The size of the shells you use will determine the burn time; larger shells will burn for longer. The sizes we’ve made here won’t last a full dinner party, but could form a centrepiece lit for a cheese and wine course, for example.
You will need to buy candle wax pellets and wick from a craft shop and, if you are not as close to a beach as we are, you can use builders’ sand or play sand to cast your shells. Candlewicks either come soft and loose, like ours, or stiffened. To enable you to poke the wick through the sand at the bottom of the mould, you can stiffen the wick by dipping it into the melted wax and letting it cool and harden. Candles should be placed on a suitable surface as their irregular shape may mean they run hot wax over the edge. Always take care with lit candles.

WHAT YOU NEED:
• Large shells to cast
• Basin of sand
• Wooden spoon
• Candle wax pellets
• Candlewick
• Double boiler or basin over a pan of boiling water
METHOD:
1. Dampen your sand so it will hold the shape, press the shell into the sand and carefully remove to leave a clean shell-shaped mould.
2. Poke the wick through the bottom of the shell shape so it will stick up out of the candle. Tie the wick to the wooden spoon so it hangs straight.
3. Melt the wax pellets slowly in a basin over boiling water, as if you were melting chocolate. Pour slowly into the mould; don’t disturb the wick.
4. After cooling for at least 45 minutes untie and trim the wick, then brush off as much or as little sand as you like to reveal the candle.
Click through our gallery below to see the candle in process:
In search of more crafts? Take a look at our step-by-step guides to a seaside monoprint and knitted journal cover, or keep an eye out for crafts in the magazine.
ABOUT SHORE COTTAGE STUDIO
Shore Cottage Studio consists of three generations of artists living and working on the Wirral Peninsula. They run short creative courses in fused glass, photography, textiles and laser-etching, taking inspiration from their surroundings. They also exhibit their work and produce commissions. Oh, and there’s usually cake. You can book a course or commission a piece from Shore Cottage on their website (shorecottagestudio.com).